
 Marry Walker
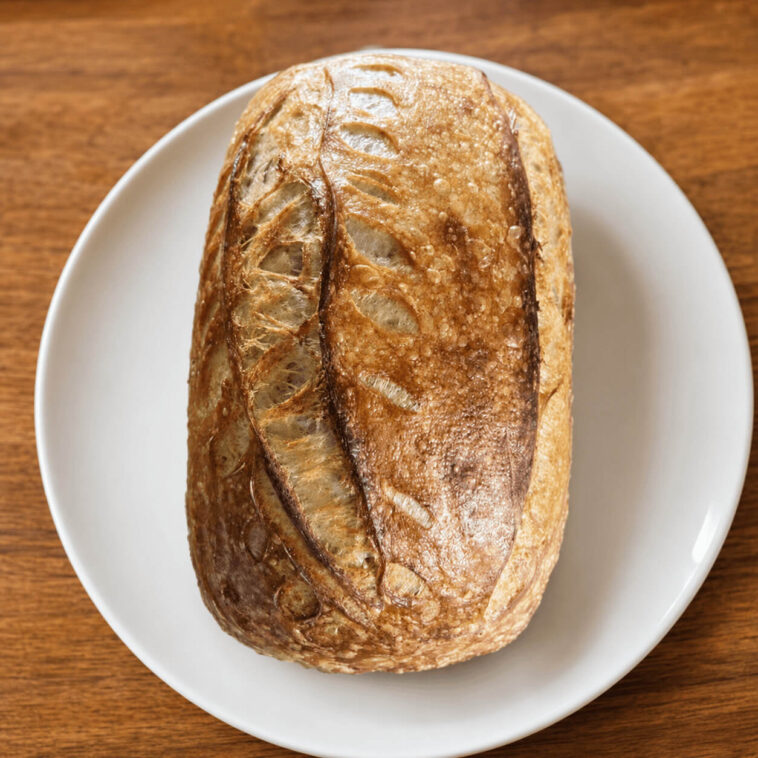
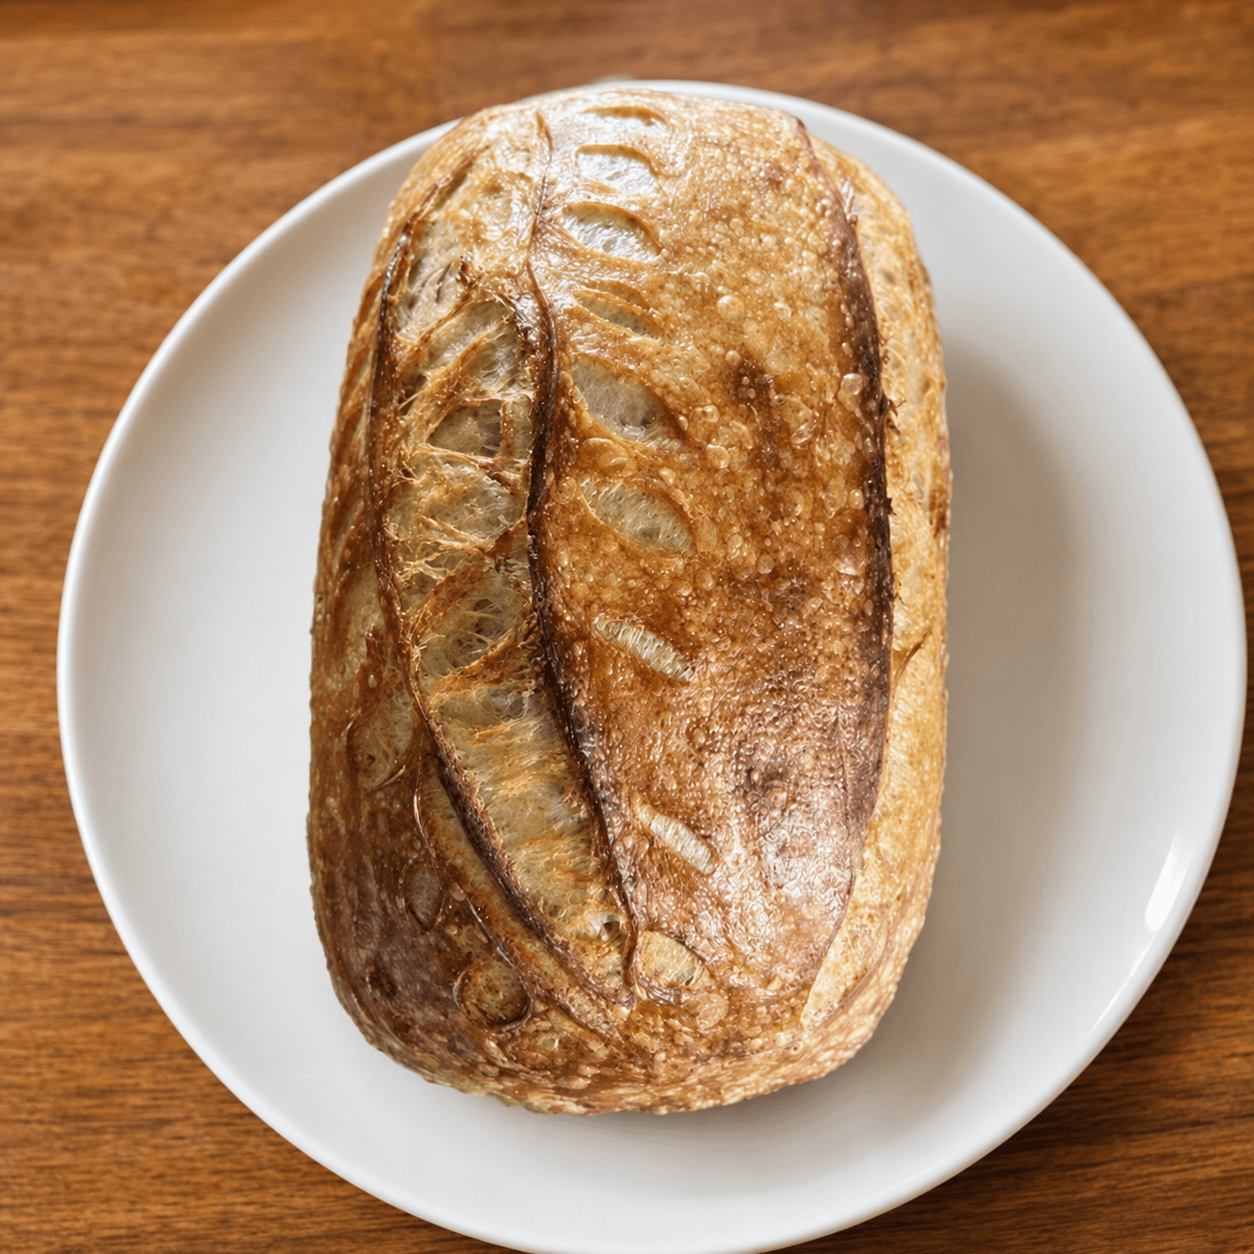
There’s nothing quite like the satisfying taste of fresh Gluten Free Sandwich Bread. Whether you’re making a delicious sandwich or enjoying a slice with butter, this homemade loaf promises a delightful experience for those on a gluten-free diet.
This recipe for Gluten Free Sandwich Bread combines a perfect mix of flours and a gluten-free sourdough starter to create a loaf that is not only wholesome but also full of flavor. Let’s dive into the process and see why this bread will become a staple in your kitchen.
Why You’ll Love This Gluten Free Sandwich Bread
- Easy to make with step-by-step instructions.
- Uses a gluten-free sourdough starter for a delicious tang.
- Perfect texture for sandwiches and toast.
- No gluten, but all the flavor and texture you love.
- Customizable with your favorite seeds or herbs.
- Great for making ahead and freezing for later use.
- Healthy ingredients that are easy to find.
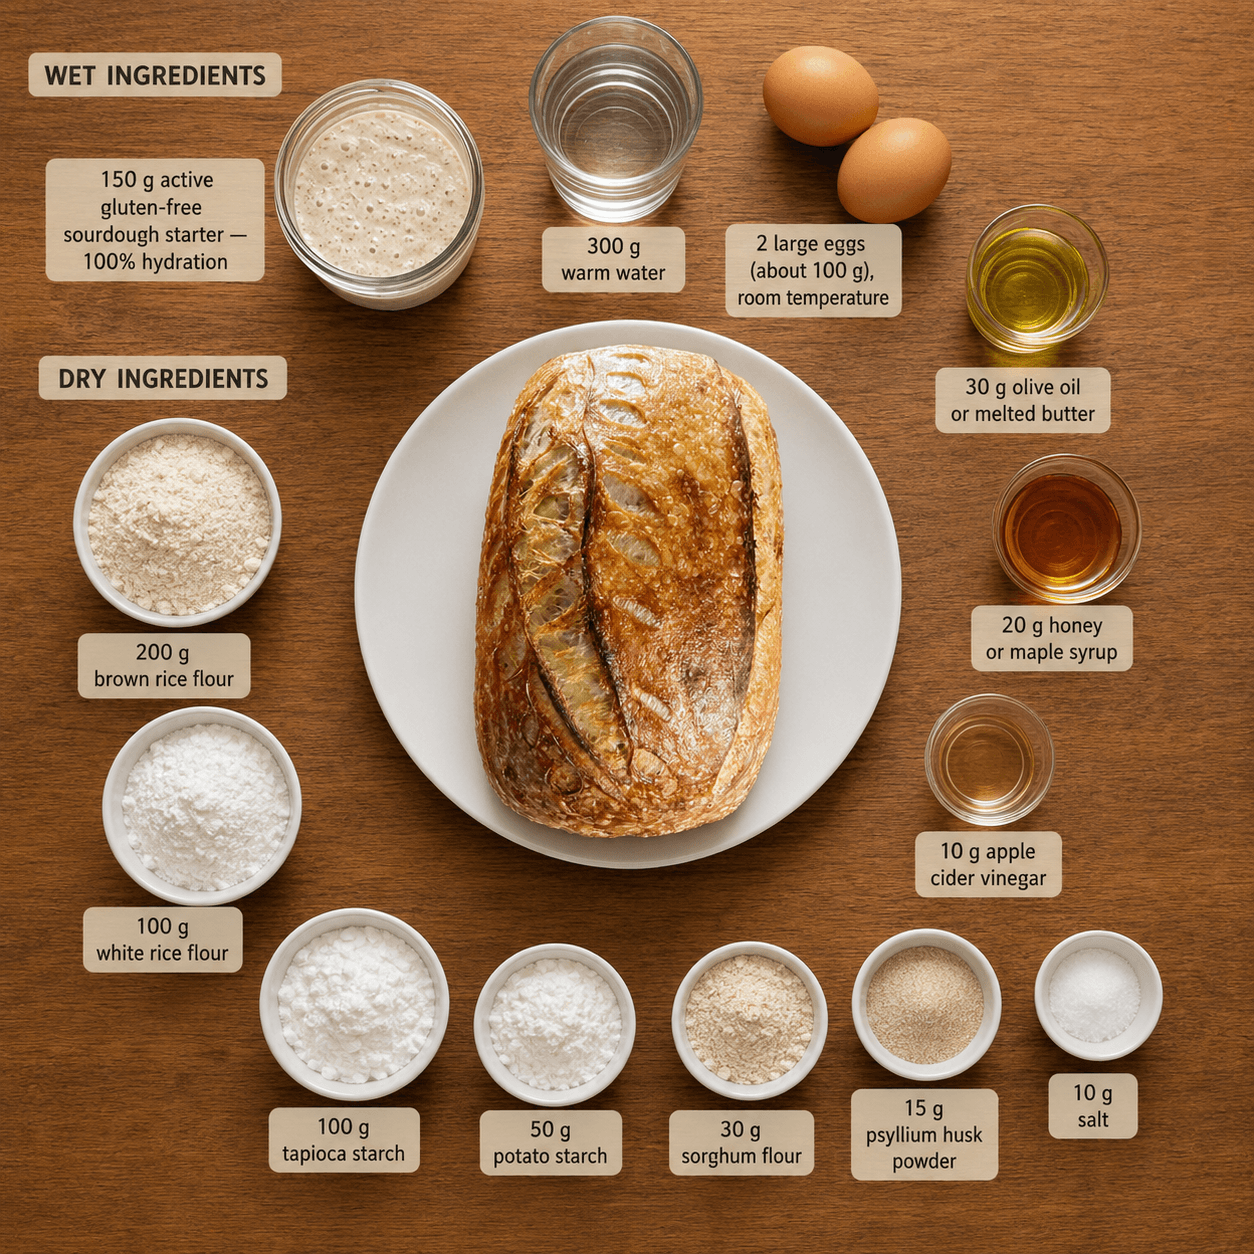
Ingredients for Gluten Free Sandwich Bread
Wet Ingredients:
- 150 g active gluten-free sourdough starter — 100% hydration
- 300 g warm water
- 2 large eggs (about 100 g), room temperature
- 30 g olive oil or melted butter
- 20 g honey or maple syrup
- 10 g apple cider vinegar
Dry Ingredients:
- 200 g brown rice flour
- 100 g white rice flour
- 100 g tapioca starch
- 50 g potato starch
- 30 g sorghum flour
- 15 g psyllium husk powder
- 10 g salt
How to Make Gluten Free Sandwich Bread — Step by Step
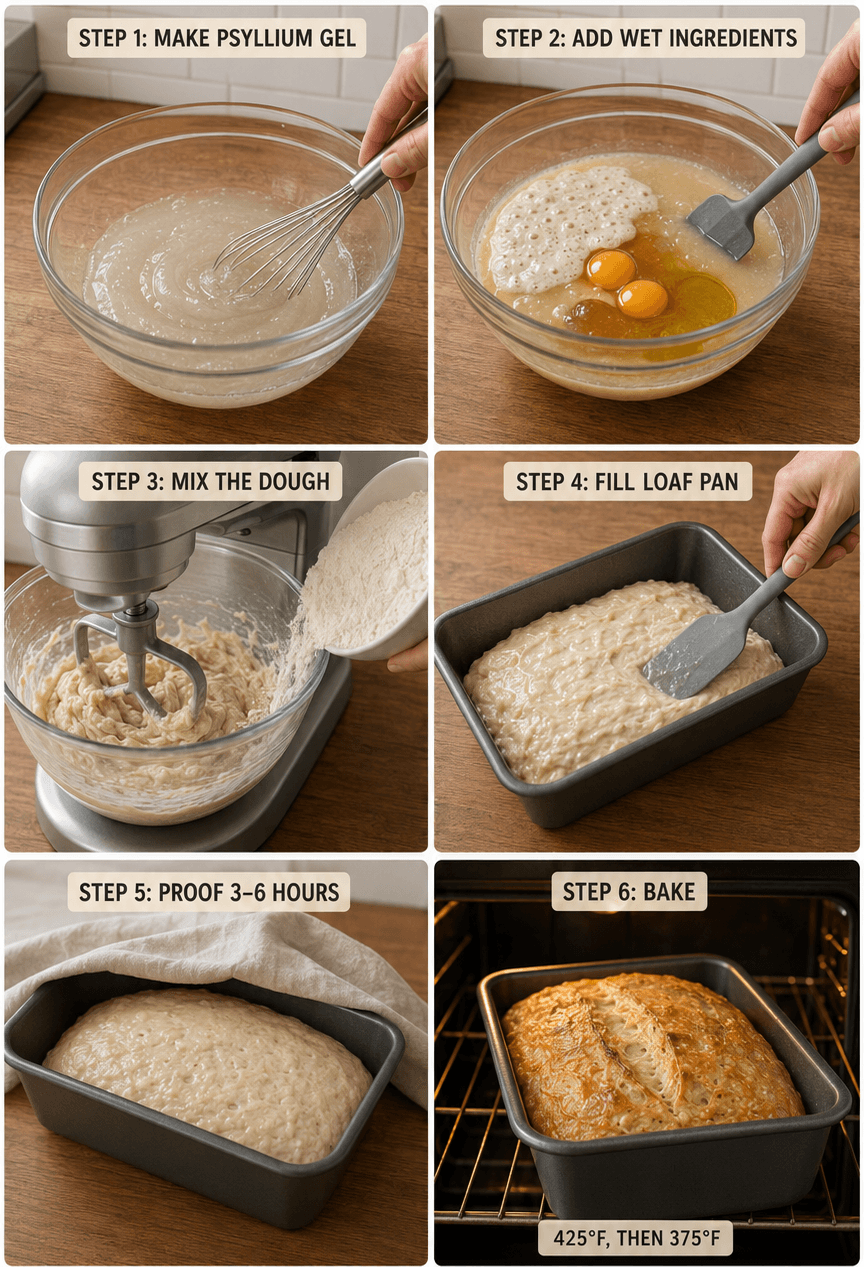
- Prepare the psyllium gel: Mix 300 g warm water with 15 g psyllium husk powder. Whisk well and let it sit for 5–10 minutes until it thickens into a gel.
- Mix the wet ingredients: Add the active sourdough starter, eggs, olive oil, honey, and apple cider vinegar to the psyllium gel. Mix well.
- Mix the dry ingredients: In a separate bowl, whisk together all the flours, starches, and salt. Gradually add to the wet mixture and mix with a stand mixer using the paddle attachment for 4–5 minutes.
- Shape and transfer: Grease a 9 × 5-inch loaf pan. Transfer the dough to the pan and smooth the top with a wet spatula. Optionally brush with olive oil.
- Bulk fermentation / proofing: Cover the pan and let the dough rise at room temperature for about 3–6 hours until it rises by 50–75%.
- Bake: Preheat the oven to 425°F (220°C). Bake for 15 minutes, then reduce to 375°F (190°C) and bake another 35–45 minutes until the loaf reaches an internal temperature of 205–210°F (96–99°C).
- Cool completely: Remove the bread from the pan after about 10 minutes. Place on a wire rack and allow it to cool for at least 3–4 hours before slicing.
Tips and Tricks for the Best Gluten Free Sandwich Bread
- Ensure all ingredients are at room temperature for best results.
- Don’t rush the proofing process; watch the dough, not the clock.
- Use a thermometer to check the internal temperature for doneness.
- Cool the bread completely before slicing to prevent gumminess.
- Experiment with adding seeds or herbs to the dough for extra flavor.
Storage and Make-Ahead
Fridge: Store in an airtight container for up to 5 days.
Freezer: Slice and freeze in a single layer before transferring to a bag. Thaw and toast slices as needed.
Reheat: Toast slices directly from the freezer or warm in the oven at 300°F (150°C) until heated through.
Frequently Asked Questions
What makes this Gluten Free Sandwich Bread unique?
This bread uses a gluten-free sourdough starter and a blend of flours to achieve a texture and flavor similar to regular bread, making it perfect for those avoiding gluten.
Can I make this as a Homemade Gluten Free Sandwich Bread without a sourdough starter?
Yes, you can substitute with commercial yeast if a sourdough starter isn’t available, though it will alter the flavor slightly.
How do I store GF Sandwich Bread to keep it fresh?
Store in an airtight container at room temperature for up to 3 days, or refrigerate for up to 5 days for longer freshness.
Can I use this recipe to make a Gluten Free Sourdough Bread Loaf in a different shape?
Absolutely! You can shape the dough into rolls or bake it in a different pan, adjusting bake time as necessary.
Ready to bake your own Gluten Free Sandwich Bread? Give this recipe a try and enjoy the delicious taste of homemade bread. We’d love to hear your thoughts, so don’t forget to leave a comment and share your creations!
You Might Also Like
Gluten Free Sandwich Bread
Ingredients
Wet Ingredients
- 150 g active gluten-free sourdough starter — 100% hydration
- 300 g warm water
- 2 large eggs (about 100 g), room temperature
- 30 g olive oil or melted butter
- 20 g honey or maple syrup
- 10 g apple cider vinegar
Dry Ingredients
- 200 g brown rice flour
- 100 g white rice flour
- 100 g tapioca starch
- 50 g potato starch
- 30 g sorghum flour
- 15 g psyllium husk powder
- 10 g salt
Instructions
- Prepare the psyllium gel: Mix 300 g warm water with 15 g psyllium husk powder. Whisk well and let it sit for 5–10 minutes until it thickens into a gel.
- Mix the wet ingredients: Add the active sourdough starter, eggs, olive oil, honey, and apple cider vinegar to the psyllium gel. Mix well.
- Mix the dry ingredients: In a separate bowl, whisk together all the flours, starches, and salt. Gradually add to the wet mixture and mix with a stand mixer using the paddle attachment for 4–5 minutes.
- Shape and transfer: Grease a 9 × 5-inch loaf pan. Transfer the dough to the pan and smooth the top with a wet spatula. Optionally brush with olive oil.
- Bulk fermentation / proofing: Cover the pan and let the dough rise at room temperature for about 3–6 hours until it rises by 50–75%.
- Bake: Preheat the oven to 425°F (220°C). Bake for 15 minutes, then reduce to 375°F (190°C) and bake another 35–45 minutes until the loaf reaches an internal temperature of 205–210°F (96–99°C).
- Cool completely: Remove the bread from the pan after about 10 minutes. Place on a wire rack and allow it to cool for at least 3–4 hours before slicing.
Storage & Make-Ahead
- Refrigerator: Store in an airtight container for up to 5 days.
- To Freeze: Slice and freeze in a single layer before transferring to a bag. Thaw and toast slices as needed.
- To Reheat: Toast slices directly from the freezer or warm in the oven at 300°F (150°C) until heated through.
Nutrition Per Serving
* Estimate only. May vary based on ingredients used.
